Majkthebajksthlm
Membre
-
Inscription
-
Dernière visite
Tout ce qui a été posté par Majkthebajksthlm
-
@TrotiRaptor Désolé, il m'a fallu si longtemps pour répondre au question! Non, ils ne sont pas assez efficaces. Je pense que cela peut devenir plus efficace si je change son angle par rapport à la roue. J'envisage de le remodeler légèrement en le pliant vers le haut tout en le chauffant avec un pistolet thermique, avec soin. Je l'ai déjà fait lors de la première installation, mais cela ne semble pas suffisant. Je doute que l'un des garde-boue des différents modèles DT soit en fait assez efficace pour des conditions vraiment humides - je suppose que les Minimotors s'inquiètent davantage du fait qu'ils aient l'air cool plutôt que d'être vraiment efficaces..! ?

-
Bon à entendre! Pour l'arrière, vous pourriez envisager le garde-boue du Compact. J'ai réussi à le fixer à mes bras de suspension Raptor en perçant un trou dans chacun d'eux pour les vis. Je suis actuellement absent pour les vacances, mais une fois rentré chez moi, je pourrais télécharger quelques photos!
-
@TrotiRaptor Hou la la! Bien joué!! Quelles sont vos opinions maintenant qu'un certain temps s'est écoulé?
-
@baam14 Oui, c'est vrai. Les moteurs à capteurs peuvent être utilisés sans engager les capteurs, bien que la commutation (et le comportement du moteur) soient, pour ainsi dire, «sans capteur», ou trapézoïdaux. Il sera donc moins efficace et produira par conséquent plus de chaleur et de bruit à partir de la puissance "gaspillée", que dans le cas de la commutation sinusoïdale (FOC). Sans les capteurs, les mesures de vitesse et de distance parcourue nécessiteraient des capteurs externes fixés au cadre de la roue. Il existe d'autres moyens de mesurer cela, comme dans le cas de la configuration EYE de Dualtron, mais les valeurs ne sont pas aussi précises que celles obtenues avec des capteurs. Je ne sais pas le mécanisme exact des fonctionnalités speedo + trip + odo de Dualtron, mais je me contenterai de dire qu'il s'agit d'une question de conjecture, bien qu'il semble plutôt qualifié pour un contrôleur qui manque de compatibilité avec les capteurs. Certains contrôleurs qui utilisent des capteurs peuvent fonctionner avec des moteurs qui n'ont pas des capteurs, mais, pas nécessairement. Dans le cas de contrôleurs compatibles FOC, tous les moteurs fonctionneraient, peu importe qu'ils aient ses capteurs ou non. Cependant, la réponse du moteur à l'entrée du contrôleur sera soumise aux limitations du moteur, lui-même (un moteur sans capteur ne peut pas générer de sortie avec les avantages du contrôle sensoriel).
-
@S3RG3I Wow, tous les changements que vous avez apportés sont assez impressionnants (sans parler de la fourche avant personnalisée - comment l'avez-vous construite? Cela semble être quelque chose à faire dans une usine utilisant des machines de pointe)! Quelle roue as-tu à l'avant? Cela ressemble certainement au Pei 200x90, si je ne me trompe pas. L'avez-vous simplement laissé déconnecté, en attente d'un contrôleur supplémentaire? Quoi qu'il en soit, tenez-nous au courant de vos progrès! Je suis extrêmement curieux et impatient de recevoir des rapports sur les performances avec Dual Phaserunners ..! ? Sur un sujet différent: À l'approche de l'hiver à Stockholm et des conditions de route mouillées et parfois verglacées qui s'ensuivent, mon prochain petit projet consistera à mettre mon Raptor à l'abri de l'hiver. Malgré l’imperméabilité du Phaserunner, je souhaite limiter les risques d’endommagement des câbles et des connecteurs en scellant totalement tous les points d’entrée à l’aide d’un type de mastic polyuréthane conçu pour les applications marines (donc, il ne se dégradera pas au contact du sel, ce qui est crucial parce-que les rues suèdoises sont salés en givet pour éviter la formation de glace).. Je prévois également d'ajouter une isolation temporaire à la batterie afin de la protéger du froid. J'espère obtenir une capacité un peu meilleure de cette façon, car elle diminuerait par basses températures. Enfin, je vais attacher de petites pointes en acier amovibles à mes pneus. Cela me permettra de rouler en toute sécurité sur des routes verglacées. Mais je suppose que vous n’êtes pas confrontés à ces problèmes de la même manière que moi…! ?
-
@TrotiRaptor Parce que j'avais commandé le moteur avant de décider de changer de contrôleur, je voulais ensuite donner la priorité à la cohérence avec le moteur d'origine. Mais il serait certainement raisonnable d'investir dans 60V 1000W si cette modification devait être apportée. @S3RG3I Un détail que j'ai oublié de mentionner: le Phaserunner est vraiment compact, compte tenu en particulier de sa puissance et de ses fonctionnalités. Cependant, je ne suis pas tout à fait sûr qu'il y ait de la place pour 2xPhaserunner dans le Raptor - à l'heure actuelle, il n'y en a presque plus. Lorsque j’installe éventuellement un autre Phaserunner, j’ai le choix entre deux solutions: raccourcir considérablement les câbles (ils sont beaucoup trop longs et prennent trop de place), mais je ne sais pas si cela suffit. L'autre option consisterait à remplacer le bloc-batterie par une alternative plus compacte (par exemple, je peux obtenir au moins autant de capacité avec moins de cellules si j'investis dans des cellules de haute qualité de LG ou de Panasonic, pour example. La qualité du package SINC existant est discutable, et j'ai réalisé que je devrais le remplacer d'ici un an. J'ai déjà constaté une certaine perte de capacité au bout de 6 mois.
-
@TrotiRaptor Franchement, je ne suis pas sûr qu'ils correspondent aux connecteurs Dualtron ou non, car je ne me souviens pas exactement à quoi ressemblaient les connecteurs phub-299 en détail. Je n'ai jamais essayé de simplement les connecter les uns aux autres, j'ai immédiatement basculé sur les connecteurs Anderson, en vue du prochain remplacement du contrôleur. Il y a de bonnes chances que le moteur puisse être instantanément connecté à votre configuration de connecteur existante (car j'ai lu que la plupart des équipements de mobilité électronique chinois utilisent la même norme). Mais si ce n'est pas le cas, vous ne devriez pas laisser cela vous arrêter! Dans le pire des cas, vous devrez souder les fils triphasés aux connecteurs correspondants à ceux du contrôleur. Vous pouvez même envisager de souder les câbles du contrôleur et du moteur directement sans connecteurs (ce qui signifie que vous devrez couper les câbles si vous deviez déconnecter ou remplacer le moteur - mais au moins, cela vous éviterait de chercher les bons connecteurs). . Quoi qu'il en soit, souder des connecteurs (ou assembler des câbles par soudure) est vraiment facile, et vous ne devriez pas considérer la nécessité de souder un obstacle. Aucune compétence particulière n'est requise pour souder un connecteur de câble: tout ce dont vous avez besoin est un fer à souder, le connecteur, un fil en étain et des dissipateurs thermiques (et quelques minutes de votre temps). Les moteurs sont entièrement compatibles avec les contrôleurs Dualtron d’origine, une fois que vous les avez connectés. Le contrôleur DT n'ayant pas de fonctionnalité de capteur, vous pouvez simplement laisser les fils du capteur des moteurs déconnectés tout en connectant les trois phases au contrôleur. C'est ce que j'ai fait lors du remplacement de la roue arrière + du moteur, avant de recevoir le Phaserunner. Il fonctionnait parfaitement, plus silencieux que le moteur d'origine et parfaitement synchronisé avec le moteur avant (Dualtron) en mode 2RM / mode "double", ce à quoi je ne m'attendais pas.
-
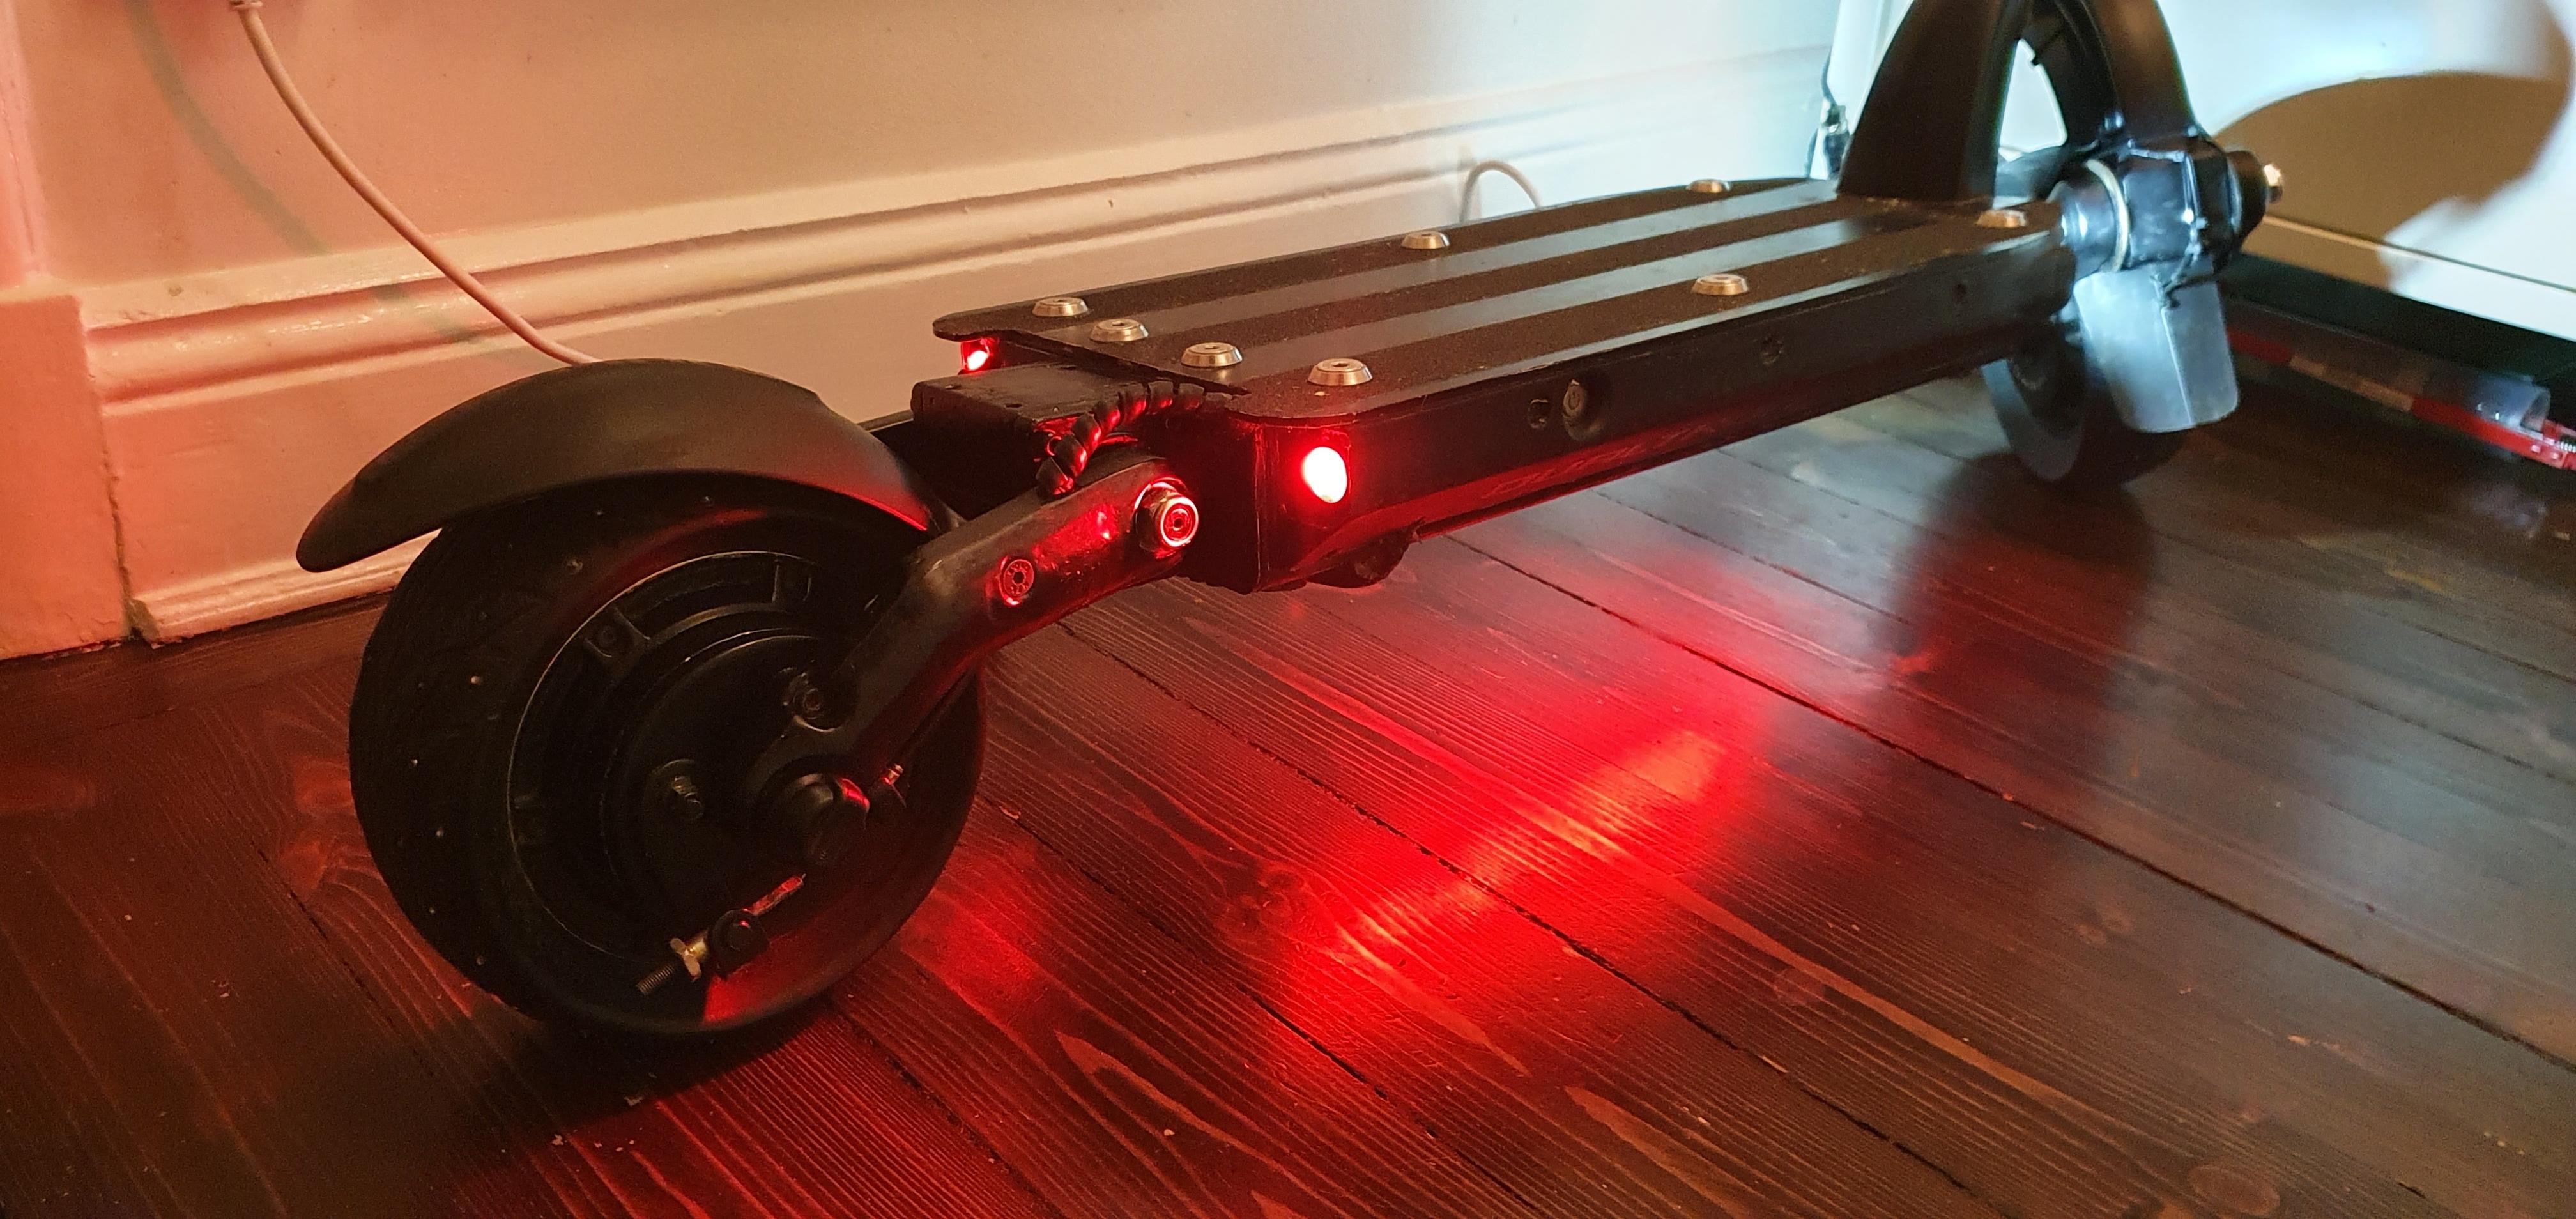
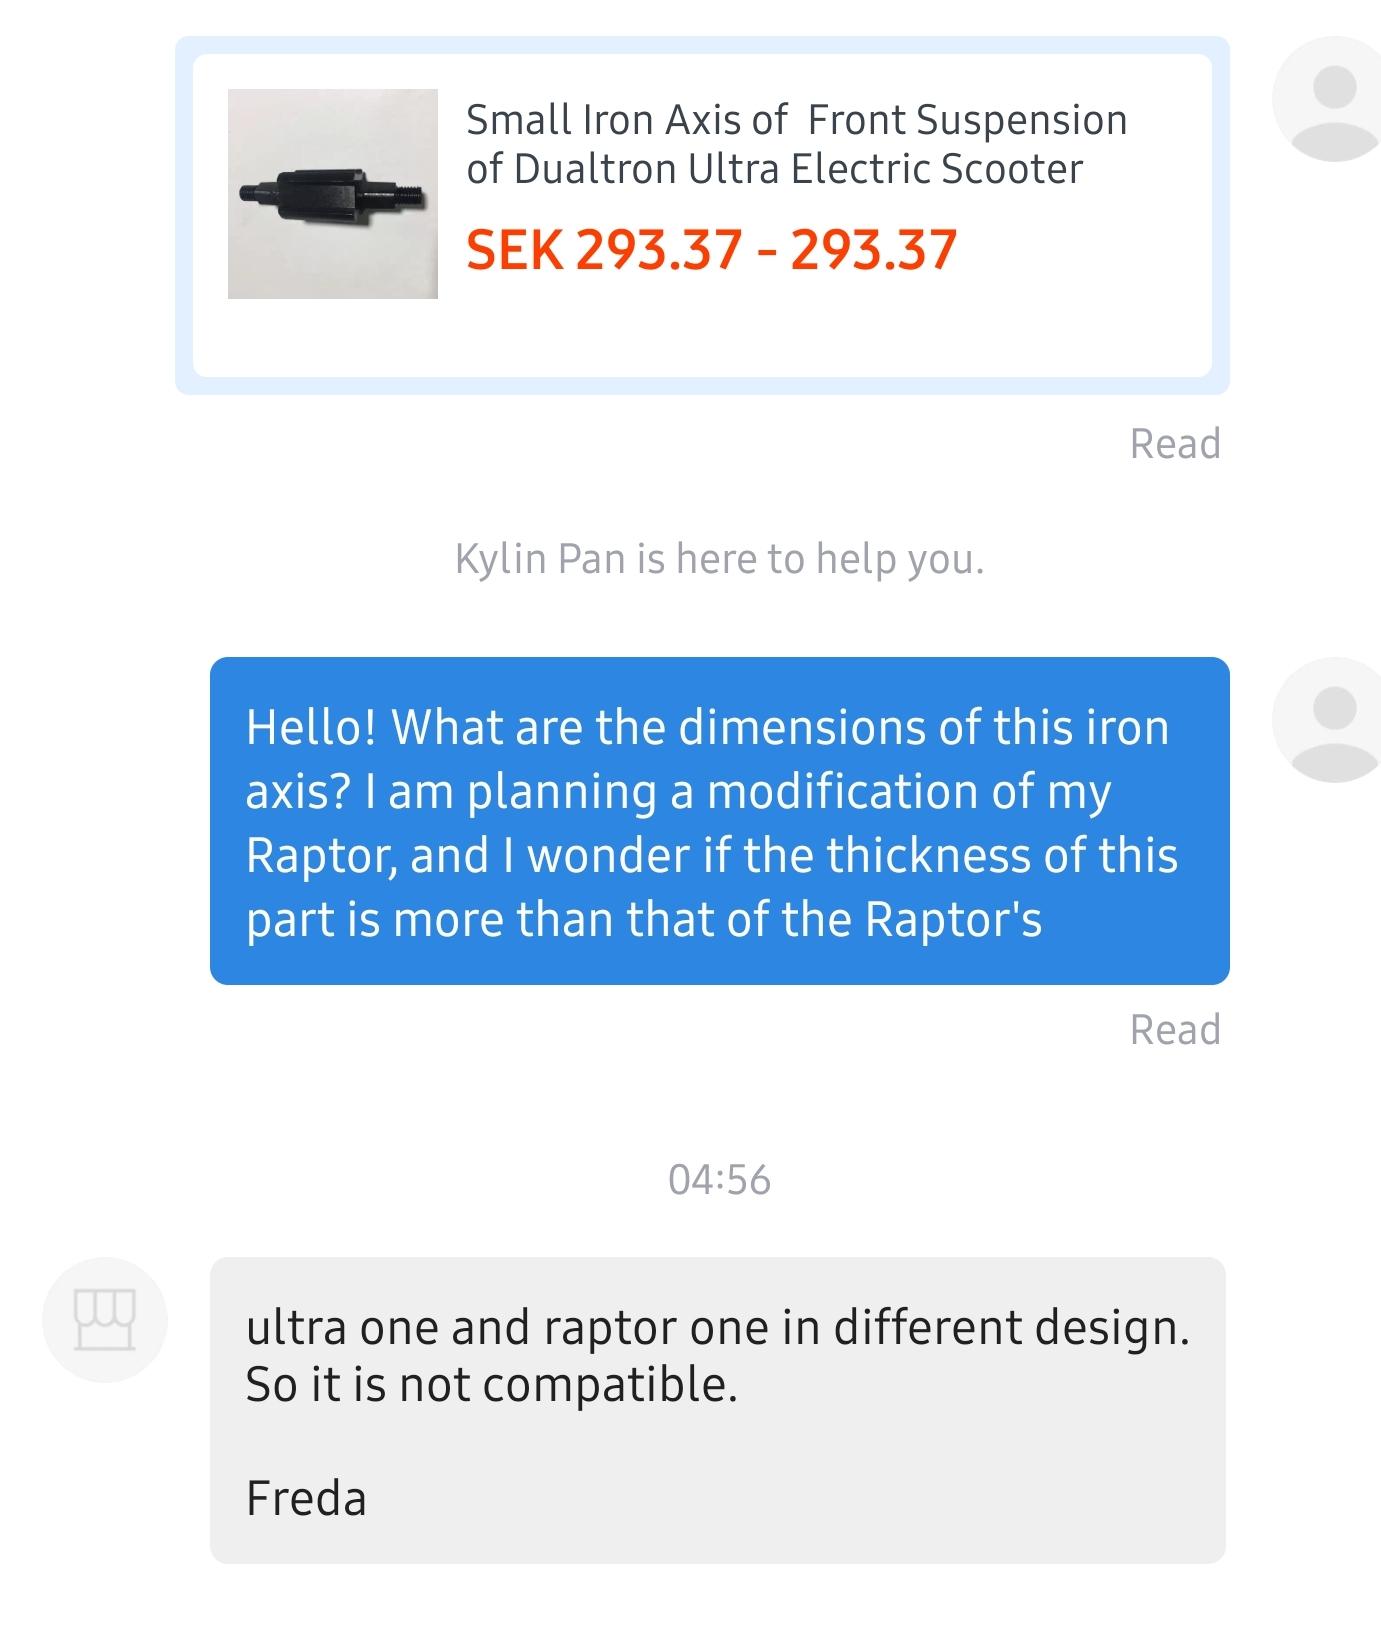
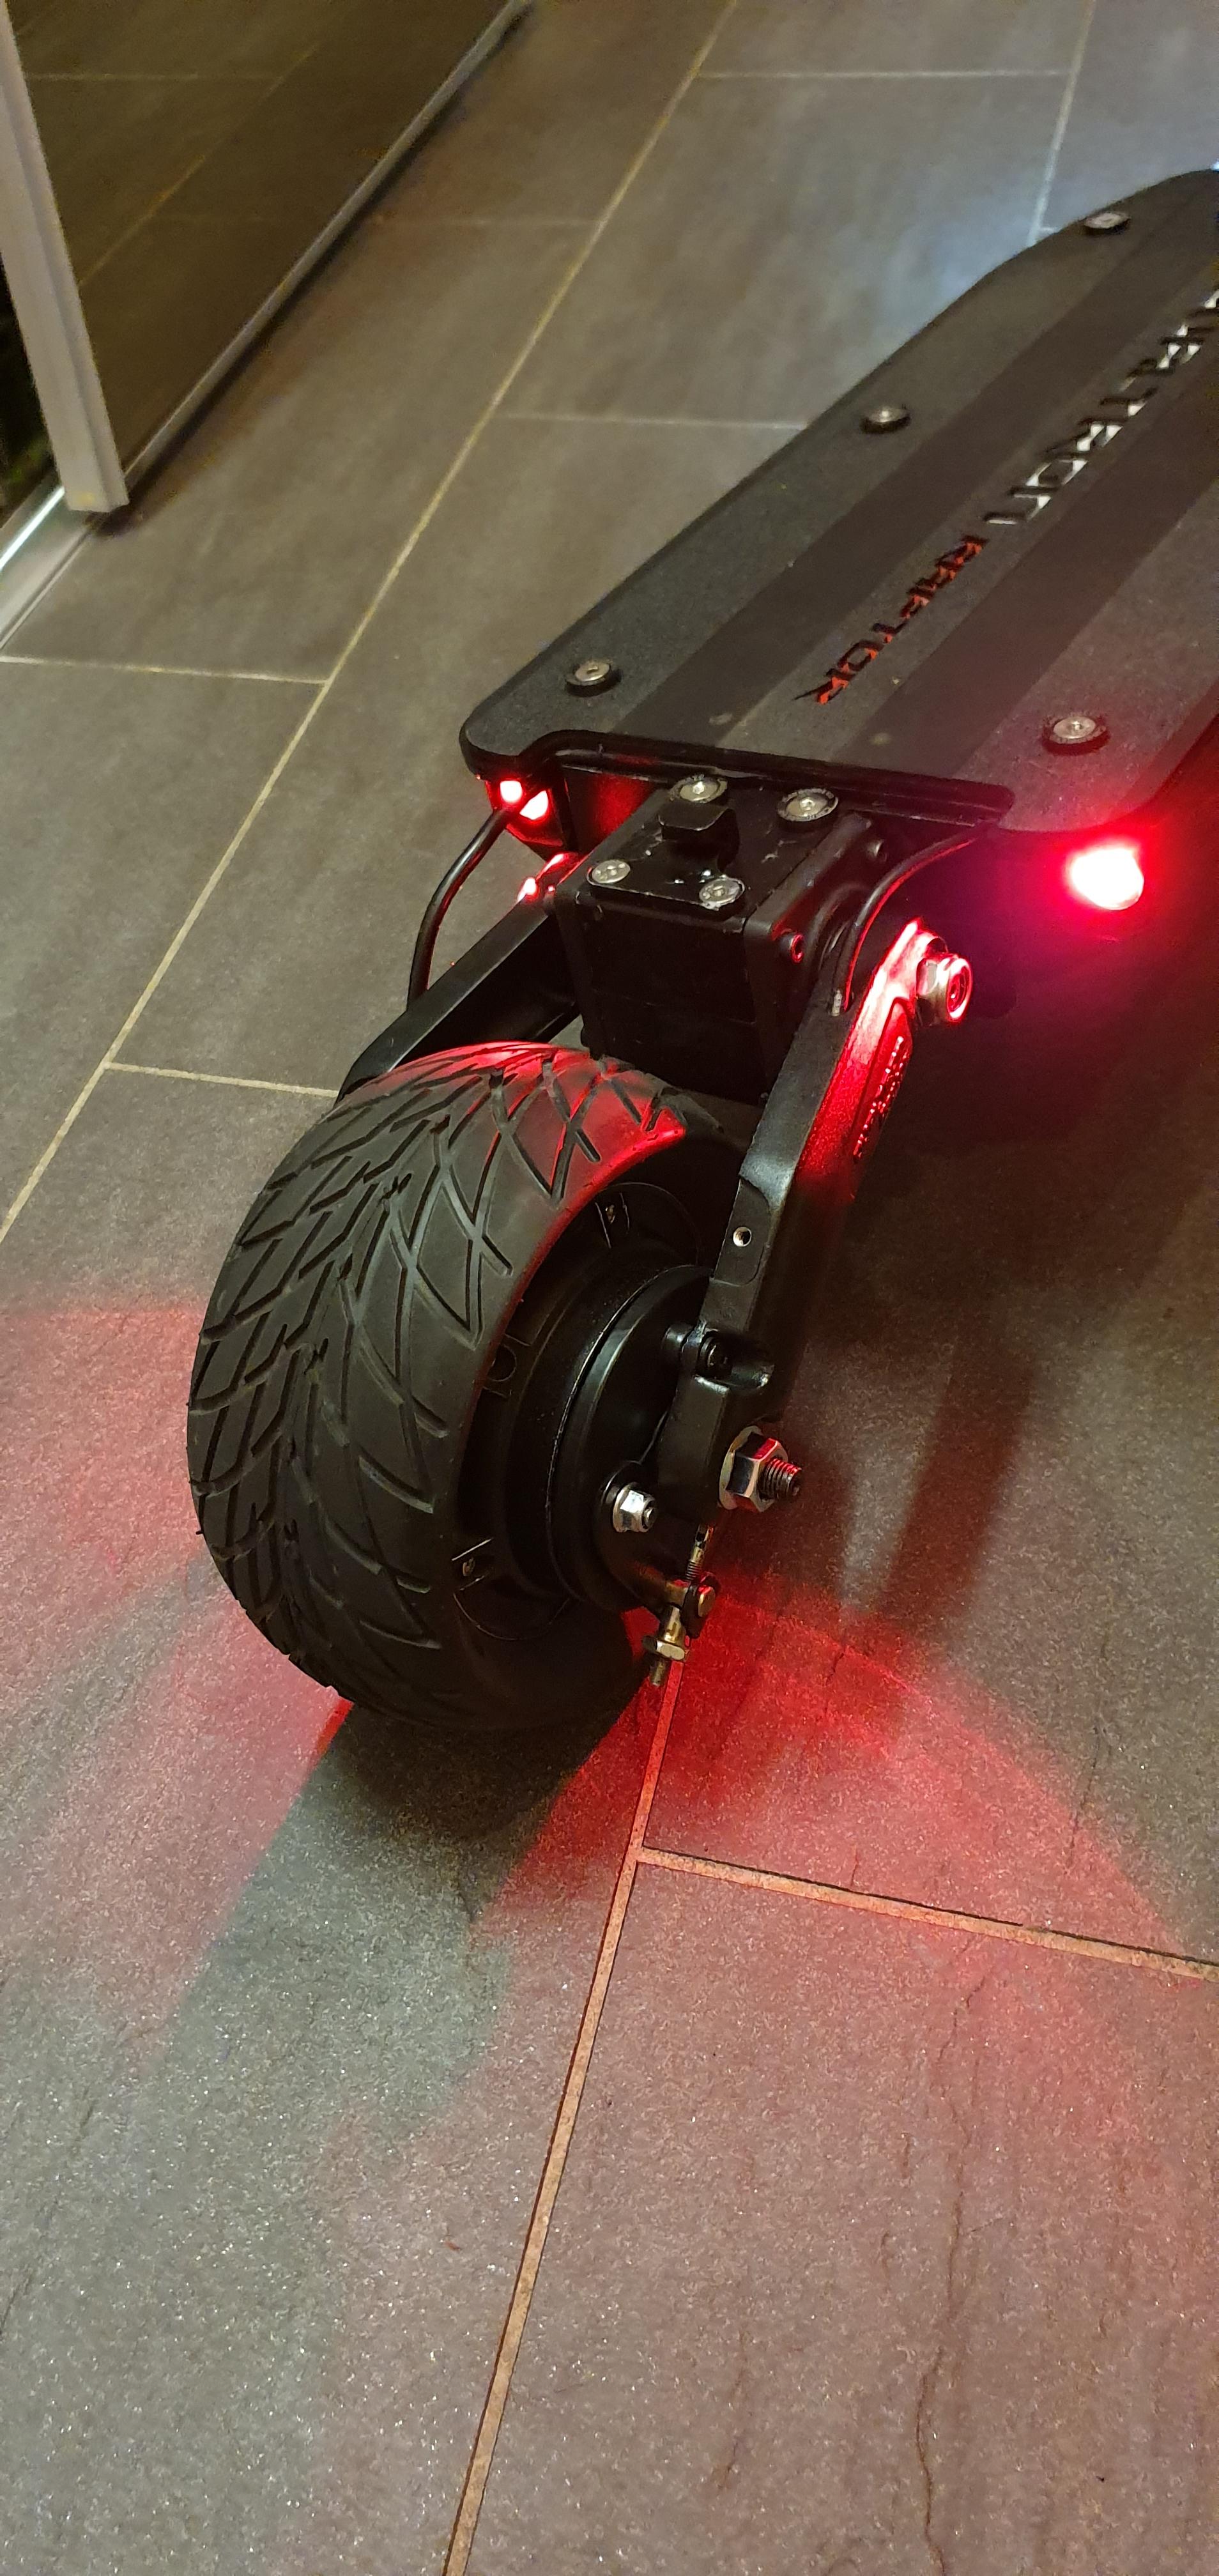
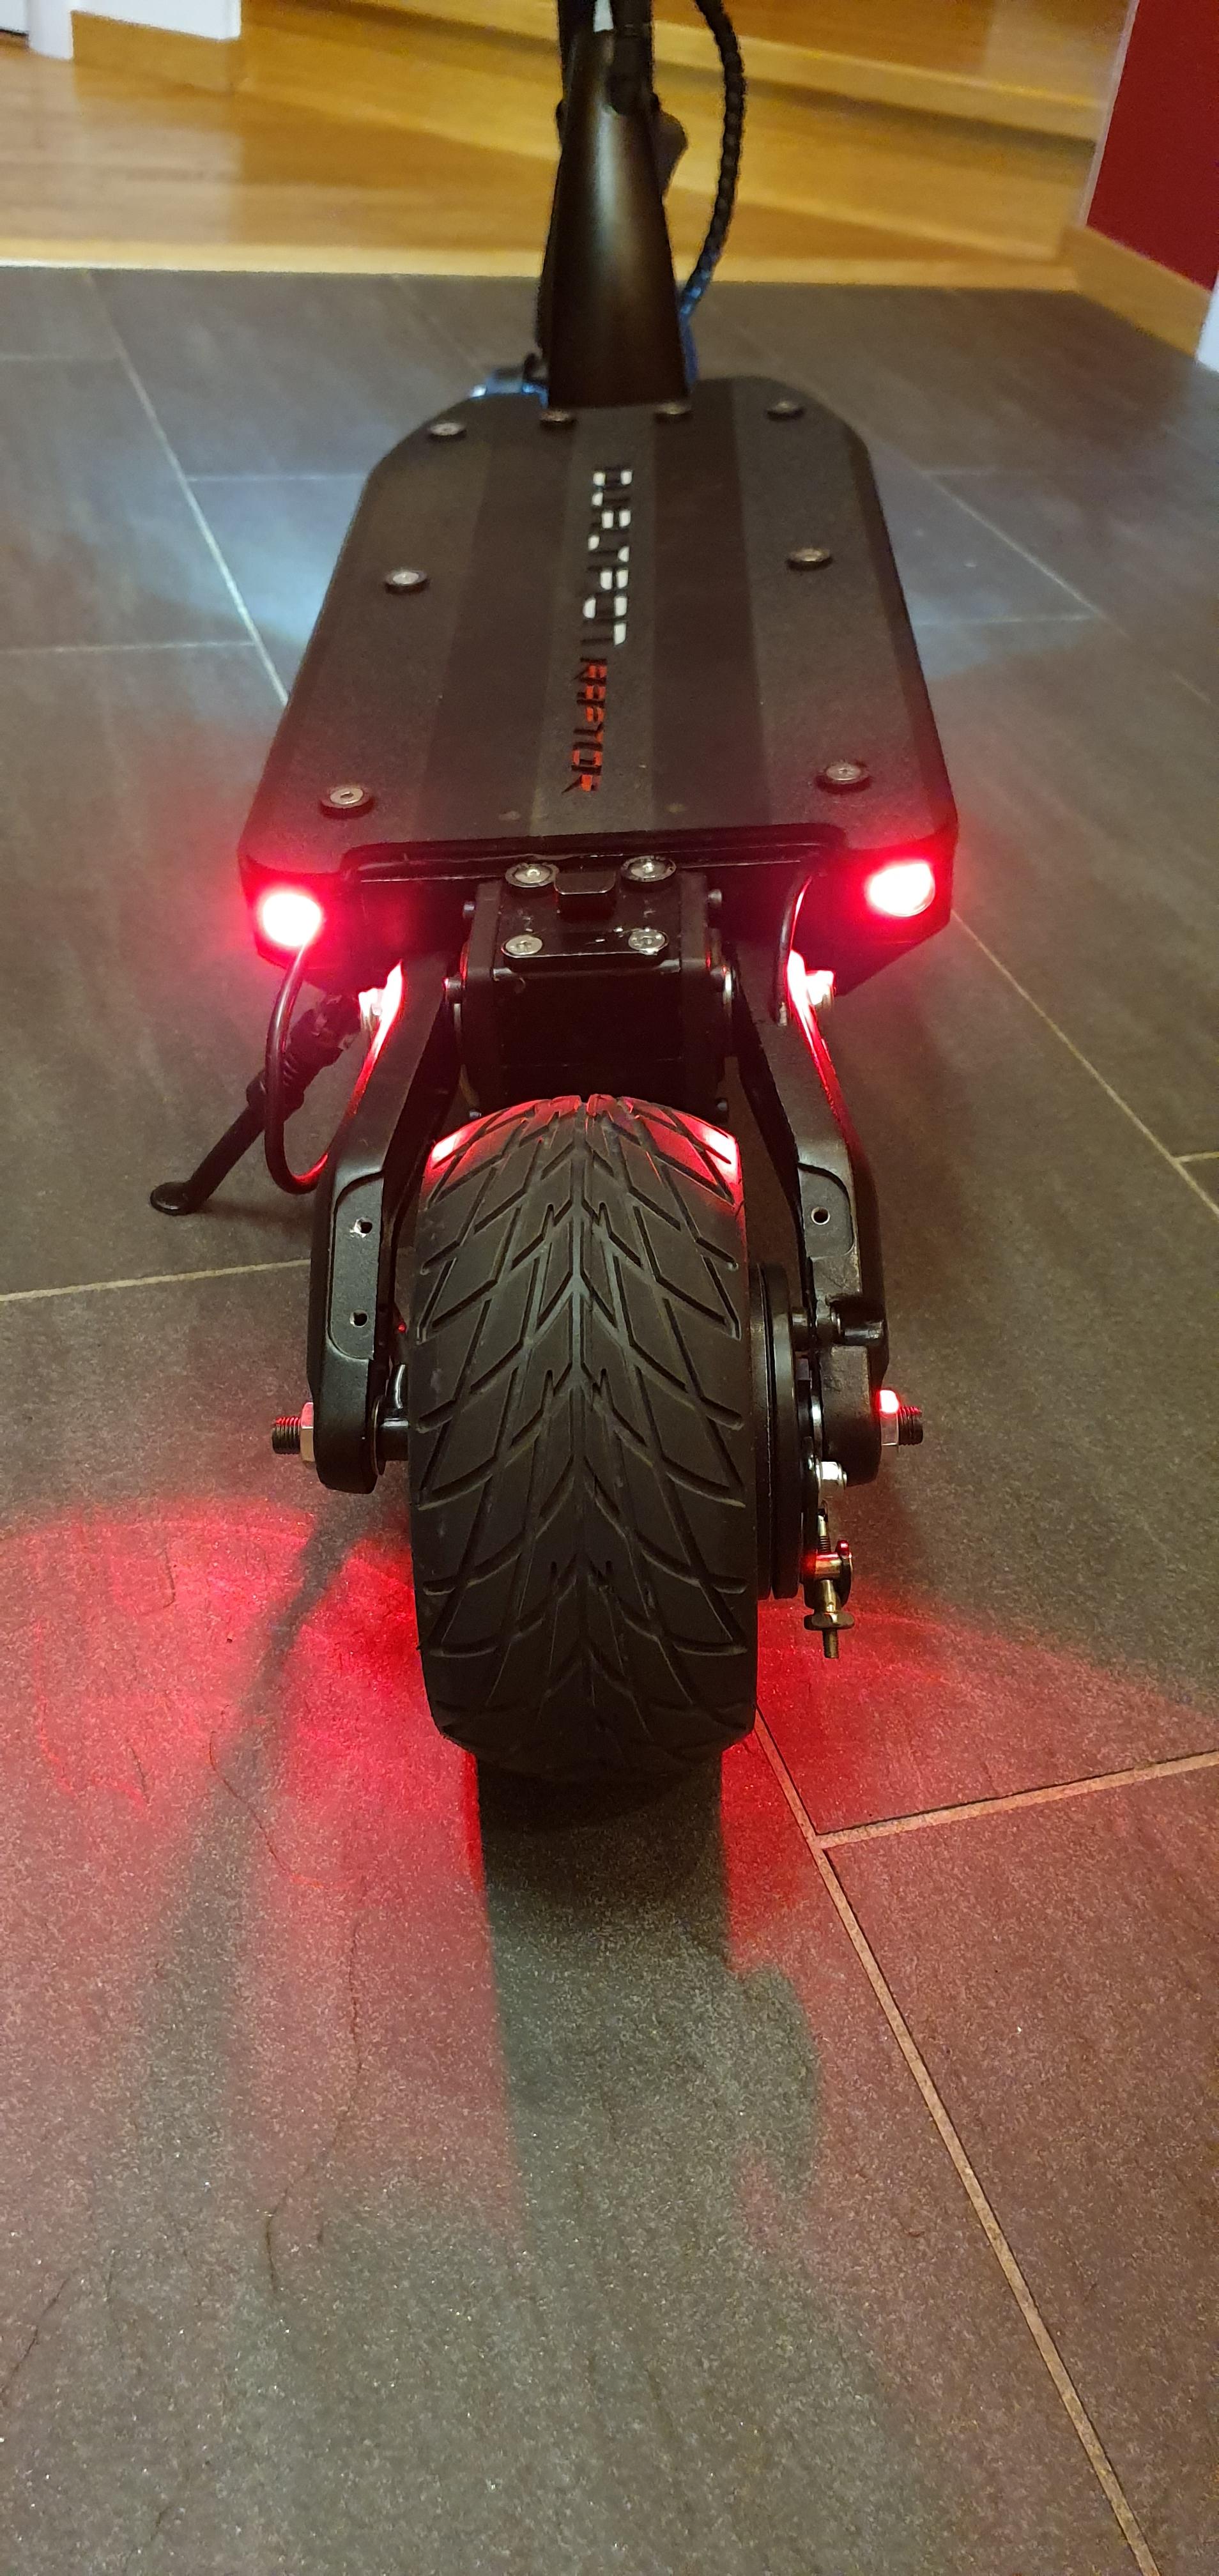
I prefer to post the following in English, as I suspect the Google Translate function produce too many errors - hopefully you’ll get a decent translation from your web browser’s built-in translation functionality. @TrotiRaptor I haven't swapped the front wheel yet. It's a project that will have to wait for a bit, as I've been spending a lot of time and money on the Phaserunner+Cycle Analyst modification. But I am pretty confident that it can be done without any major complications to the existing suspension arm setup (assuming you simply swap the hub covers prior to installation - replace the drum/disk brake hub cover (that is attached to your new motor, preferably the one previously mentioned - Peipei @ aliexpress - I'll explain why, further down) with one of the original raptor hub covers. It fits perfectly, and all screw holes are identical to the raptor motors. By removing the brake cover, you keep the width of the wheel to a minimum and thus should be able to fit it without changing swingarms. You may have to add spacers or something similar to the top shaft of the suspension (or "small iron axis", as Kylin refers to it, at KWK), but I am not certain of the necessity for this. @Fab Znam - This is my motor: https://www.aliexpress.com/item/32961627060.html?spm=2114.12010615.8148356.1.6fcd2c44RmKyWo. I pull a maximum of 45A from the battery pack (you probably know thisd, but to everyone who might not - never set amperage max limits without knowing your battery capabilities first). However, the Phaserunner is able to push even more amps than what’s pulled from the battery by converting voltage (as I understand it - there might be a more correct explanation) - and I set that limit to 90A. The motor is only rated for 20A continuous current, according to the manufacturer, but for short periods you can push way more current than so, as long as you keep an eye on the motor temperature. I also inject “statorade” that helps cooling the motor - it works wonders and can be ordered from: https://www.ebikes.ca/product-info/statorade.html. All in all, I can now get even more powerful acceleration from a single motor, than what I previously got while on dual turbo mode - not from a stand-still (although it's improved, as compared to single motor turbo mode) but while already moving. Thanks to the phase current the Phaserunner produces, it gives you massive torque while accelerating in higher speeds and for maintaining speed as you go uphill. @S3RG3I @asgar @TrotiRaptor First I’d like to apologize for delaying with a further description of my Phaserunner modification. But here it goes - I'll try to keep it compressed, and I will upload a couple of video clips on my Raptor in action in a few days or so, to give you an idea of the performance of the new setup. Here is a somewhat simplified set of instructions for this mod - but keep in mind that those are MY experiences from attempting this myself, without any available instructions applicable to electric scooters in general (or DT Raptor in particular). The Phaserunner is mainly marketed for use in electric bicycles, while e-scooters in general use less sofisticated controllers - hence the lack of records or instructions online. There's this one Israeli guy who uploaded a couple of YouTube clips of his Inokim Ox after having installed the Asi Bac 800, which is basically the same as the Phaserunner with similar specifications; and the output he achieved was insane - but he never posted any instructions or further details on how to do the modification. However, it made me realize it's possible to pull it off on an electric scooter, and so I made up my mind to give it a try. In my honest opinion it wasn't really complicated at all, despite having no previous experience of electronic work (such as soldering connectors, or splicing cables, and so on). I simply learned along the way what I couldn't figure out myself, using YouTube for tutorials on basic electronic modifications, such as soldering. Here’s my list of purchases: The Phaserunner, along with a standard "motor cable harness" of desired length as well as a "USB->TTL communications cable", from https://www.ebikes.ca/shop/electric-bicycle-parts/controllers/phaserunner.html A bunch of Anderson PowerPole connectors, as you will have to replace your existing high current connectors with these in order to fit your new Phaserunner cables (2 plugs go on your battery power discharge cables, that will feed power into the Phaserunner, and 3 plugs goes on your motor phase wires, that connects to the plugs on the Phaserunner motor output cable): https://www.ebikes.ca/shop/electric-bicycle-parts/connectors/conanderson.html You'll also need a bunch of JST connectors to connect any low current cables to your new setup, such as your throttle or aux buttons/switches: https://www.ebikes.ca/shop/electric-bicycle-parts/connectors/conbag.html The Cycle Analyst V3 - it’s not a requirement, as the Phaserunner can be controlled with just a throttle if you connect it straight to the Phaserunner, but I highly recommend getting the CAV3, as it gives you access to a ton of settings and on-screen information, such as battery level, speed, trip+odometer, current amp draw, current power output, throttle ramping adjustments, preset profiles, proportional regenerative braking and e-braking, and loads of other things: more info can be found at https://www.ebikes.ca/product-info/cycle-analyst-3.html and ordering is done at https://www.ebikes.ca/shop/electric-bicycle-parts/cycle-analysts/ca3-dp.html. Be sure to order the version that is meant for Direct Drive hub motors with internal speedometer (e.g. hall sensors). If you insist on keeping the original (sensorless) Dualtron motors, you would have to get the version that has an additional speedometer sensor. External buttons and switches can be added to your CAV3 setup as well, if you would like to set up some presets for quick switching on-the-go (such as, for example, economy mode, turbo mode, speed or power limits, etc): https://www.ebikes.ca/shop/electric-bicycle-parts/ca-accessories/aux-input.html. Personally, I find those of no use for my specific needs. A compatible (3-wire) potentiometer throttle - I use the Wuxing thumb throttle available at https://www.passiongadgets.com/wuxing-108x-2in1-thumb-and-finger-throttle-speed-controller/, but there are also a bunch of options available here on Grin’s own website, for which you are ensured compatibility with the Phaserunner and CAV3: https://www.ebikes.ca/shop/electric-bicycle-parts/throttles.html Regarding the Phaserunner's ingenious e-brake functionality (it supports proportional regenerative braking, meaning you can adjust the braking strength in real-time by engaging your brake lever just a tiny bit to activate the e-brake sensor; and then using your throttle to control braking intensity - pressing harder means more intense braking - the max braking strength can be adjusted through the Phaserunner). This is simply phenomenal in practical use, and it does a fantastic job to enhance the Raptor's braking capabilities while also regenerating power to you battery. The CAV3 will display the additional power that your regenerative braking generates - in my experience it usually adds about 7-10% to my range, on a typical ride. In order to enable the e-braking functionality (and proportional regen) you will need either a separate e-brake lever, or an e-brake sensor that attaches to your existing brake lever and plugs into the CAV3 (a so called "tripwire") - this is the setup that I chose, and it works superbly together with the drum brake - it has dramatically shortened my braking distance. Check out both options here: https://www.ebikes.ca/shop/electric-bicycle-parts/ebrakes.html An "Anderson tap" - this item allows you to supply your existing front and rear LED's with power (or anything else that you'd like to add to your setup that requires power) via the original Dualtron DC/DC converter (as the Phaserunner does not come with native lighting functionality, this is a good work-around): https://www.ebikes.ca/shop/electric-bicycle-parts/wiring/andersontap.html And of course - a sensored motor! Although the Phaserunner does also support sensorless motors, such as the original Dualtron ones, these do not work with the sinusoidal commutation that enable many of the advancements of an FOC controller (such as perfectly silent acceleration, smooth throttle control, pulse width modulation for increased top speed, and more). For the Raptor, I suggest getting the Peipei phub-299, which I have previously installed to replace the original rear motor+wheel (covered in previous posts): https://s.click.aliexpress.com/e/FxNKO7UOR. This motor comes with hall sensors pre-installed (but you will have to crimp/solder JST connectors to these wires), which connect to your Phaserunner to enable full FOC functionality. Furthermore, it's also a great motor - disregard the bad reviews on the aliexpress site, as one of them is actually mine, from before I got everything up and running. I've been using this motor (800W, 60V) as my only motor since I finished the mod (as I only installed one Phaserunner, which can only power one motor). I'm able to push approximately 3000W of output through it during brief moments, but most of the time it's around 2000-2500W continuously, despite being rated for 800W "only". This works just fine and does not damage the motor, as long as you don't allow it to overheat (on a hot summer's day, you should be cautious). Another pro of this motor is that it is a lot cheaper than, say, the Dualtron Compact motor (which lacks hall sensors and thus FOC support). The thickness and shape of the shaft is identical to the original motor shaft (M10 threads), and the screwholes in the side covers are also identical to the original Raptor motors, which makes it plug-and-play compatibly (although you will need to solder new connectors onto its phase and hall cables). This purchase list presumes the combination of the Phaserunner controller and the Cycle Analyst V3 interface - if you use a different controller, you will need extra connectors and shunts between the CAV3 and your controller. More info can be found at the Grin website (ebikes.ca). Here's the basic modification process: Step 1: Remove your old controller and the cables attached to it. Also remove your EYE3 LCD throttle, the interconnecting wiring between the throttle and controller. Cut the battery discharge cables (power IN to the controller) at the controller end. However, leave the following intact: The battery discharge cables, supplying the original controller (and soon the Phaserunner) with power. Also leave the two cables connecting the controller to the DC/DC 12V step-down converter's input (that's located in the right side department of your deck) - cut them at the controller end, leaving them connected to the converter. Also, optionally; keep the brake sensor cable - cut it at the controller end (see more info about this in next step). Step 2: Cut the original connectors off the battery discharge cables and solder Anderson Powerpole connectors on the cable ends. These will connect to the Phaserunner. This is to be done on ONE pair of battery discharge cables (there are 2 pairs, since DT's are dual motors and the original controller is, in fact 2 controllers in 1 unit); if you're installing dual Phaserunners for a 2WD setup, you will have to solder Anderson PowerPoles onto the other pair of battery discharge cables. If not, seal and isolate the unused cables (using heatshrinks) in order to secure them from causing short circuits or damaging your other gear in any way. Don't remove them. Important note regarding brake light functionality: One thing that I overlooked as I removed all the old cables and things to be replaced, is the rear brake lights. I accidentally removed the electronic brake sensor cable, thus removing the brake light functionality (intensified rear LED light while braking). I don't really know how to get this to work with the new setup, or whether it's a functionality that's fully depending on the controller supporting it, but I suspect it can be preserved to use with the Phaserunner setup somehow. I honestly don't mind having no brake light functionality, as I'm fine with the regular, constant light of my rear LED's. But if you want to keep this functionality, you should take a look at a wiring diagram: https://images.app.goo.gl/a1pbQmqYFGUgGvM68 (this is also great to refer to throughout the modification process, should you be unsure of which connection goes where or if you simply want to take measures to avoid mishaps, by planning each step of the mod carefully. It takes some getting used to reading and interpreting the diagram, but it's actually quite simple once you get used to it. Step 3: Plug your Anderson Tap to the battery discharge cables, and connect the DC/DC 12V converter input wires to the Anderson Tap (either install a female DC plug onto the DC converter input wires and connect to the Anderson Tap's male DC output; or solder Anderson PowerPoles; or simply cut and solder the loose ends together, finishing with a heatshrinks. This gives you front+rear LED functionality as before - when main power is switched on, lights are toggled ON/OFF with the usual button on the right side of your deck. Step 4: Connect the Phaserunner to the battery by plugging the two power discharge cables (which has Anderson connectors, unless you opt for a different cable harness as you order the Phaserunner) into the Anderson Tap, which in turn plugs into the Phaserunner power input. ENSURE THAT THE MAIN POWER SWITCH IS TURNED OFF PRIOR TO CONNECTING THE PHASERUNNER TO THE BATTERY DISCHARGE CABLES! Step 5: Plug your motor cables (phases + hall sensors) into the Phaserunner's motor output (I am hereby assuming that you have already installed a new, sensored motor, that you have fitted with the proper connectors - Anderson PowerPole connectors on the three phase wires (these are the thick ones) and a JST plug to the hall sensor wires, which are the super thin ones - usually 4 or 5 in total). Step 6: Connect your throttle to your Cycle Analyst, which in turn is connected straight to the Phaserunner using the existing 5-pin JST cablage. Step 7: Download and install the Phaserunner software suite onto a PC computer (available at https://www.ebikes.ca/product-info/phaserunner.html#software-suite). Turn on your scooter's main power and connect the Phaserunner to a computer using the USB->TTL cable. Step 8: Run the initial controller-motor setup. This is quick and as soon as it's done, you're good to start customizing your Phaserunner using the computer software. You can tweak loads of things, such as torque ramping, regenerative braking strength, max battery and motor current, pulse width modulation, and one of my favorites - simulated freewheel, which feeds a small, adjustable current to your motor as you let go of the throttle, in order to cancel out the magnetic drag of the motors that tend to slow you down - this enables you to release the throttle during declinations without losing speed. See the user guide for all functionality, on the same webpage linked in step 7. Step 9: Set up your Cycle Analyst. Keep in mind that, due to its advanced functionality, it's a bit of a process to go through the setup of the CAV3. Since it mainly targets DIY e-bike (or e-vehicle) builds, it lacks a speedy auto-setup functionality, and needs to be manually tuned to conform to your controller, your motor and your battery pack characteristics in order to give you the correct readings. It also requires fine-tuning the throttle behavior. Thus, it does require some patience in order to get it set. But it's worth every second you spend on the setup process, as the Cycle Analyst allows you to monitor or tweak pretty much anything that goes on with your vehicle. Like, really - it's a fully equipped control centre for your e-scooter that, once initialized, will allow you to fine-tune and adjust every little aspect of your riding experience. It even supports temperature monitoring of, for example; your motors, in order to avoid overheating and to allow you to squeeze out every possible watt of your motors - with no risk of performance degradation due to demagnetization. Make sure to read through the user guides, both the official and the unofficial ones (especially the latter), in order to learn about the many functions. The user guides are available here: https://www.ebikes.ca/product-info/cycle-analyst-3.html#user-manuals That's it! In case I've left anything out by mistake (which is highly possible, especially since I've been awake all night, writing this), or if you're missing any relevant info, just write me back in this topic and I will do my best to help out. As I mentioned in the beginning of this post, I will soon be back with some videos from riding that could give a sense of the major improvements I've experienced since performing this modification.
-
@TrotiRaptor 2 Phaserunners peuvent être facilement connectés l'un à l'autre et 1 manette des gaz - ce serait une configuration 2WD vraiment folle! Il existe même un câble / connecteur dédié disponible à cet effet. Ça, c'est certainement quelque chose que je pourrais envisager dans quelques mois. @S3RG3I Je posterai la liste de courses détaillée dès que je pourrai, avec quelques instructions de base basées sur ce que j'ai appris au cours du processus (ce sera probablement un long post). En attendant, consultez la page suivante: http: //ebikes.ca. C’est le site Web principal et la boutique en ligne de Grin Tech (Grin Technologies sont les concepteurs et les fabricants du Phaserunner, situé à Vancouver, au Canada).
-
Bonjour @Trotiraptor! Je n'ai pas apporté d'autres modifications concernant les roues du Compact. Mais j’ai retiré mon contrôleur de stock et le ai remplacé par un Phaserunner (c’est-à-dire un seul contrôleur + moteur actif. Il est également possible d'ajouter un autre contrôleur si vous souhaitez conserver 2WD, mais à mon avis, ce n'est vraiment pas nécessaire.). Cette modification a entraîné une amélioration considérable de presque tout ce qui concerne la conduite de mon trott. La finesse, le silence complet et l'accélération folle à haute vitesse sont tout simplement géniaux (passer de 30 km / h à 50 km / h ne prend que 2-3 secondes) - avec seulement le moteur arrière! Je peux vraiment recommander ce mod. Le contrôleur est entièrement programmable et a un freinage régénératif proportionnel - tout simplement du génie. La commutation FOC devrait être vécue par tout le monde. Je ne reviendrai plus jamais sur les contrôleurs bruyants et saccadés. Rappelez-vous que ce mod nécessite également le remplacement de la commande des gaz et de l'écran - j'utilise le Wuxing thumb Throttle et le Cycle Analyst V3. La CA n’est peut-être pas très jolie, mais elle est vraiment incroyable.
-
Je sais pas si j'ai la version à laquelle vous faites référence (l'étiquette de fabrication de mon trot se lit en 2018-12), donc j'ai fait une mesure rapide, sans démonter. C'est la même chose en termes de largeur TOTAL (~ 122 mm).
-
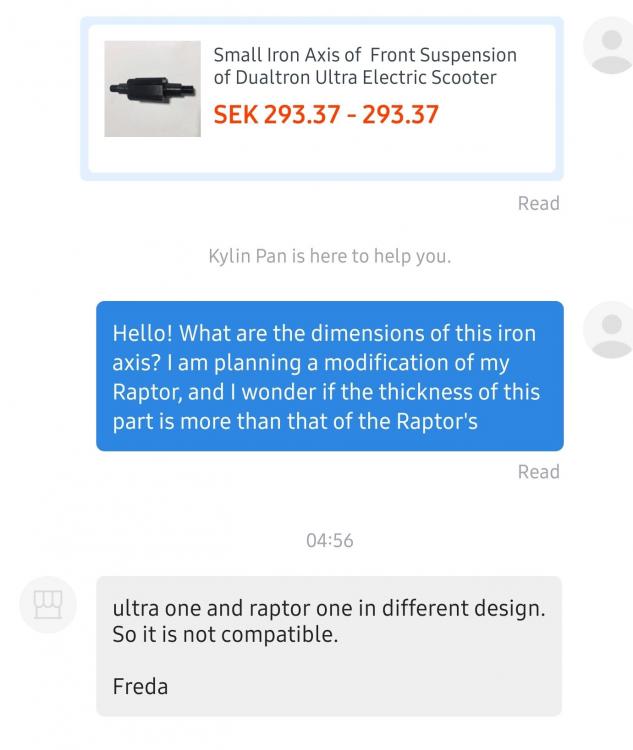
@TrotiRaptor Bon, c'est un forum français, après tout. ☺️ Je vais utiliser Google Translate à partir de maintenant. J'ai donc reçu une réponse de Freda disant que les bras oscillants Ultra ne conviendraient pas non plus, car les trous sont d'une taille différente de celle de l'axe du Raptor. Mais je pense que vous avez un point, je pense que l'axe de l'Ultra pourrait bien tenir sur le bras / tige de suspension du Raptor. J'ai donc commandé un de toute façon, et devrait l'avoir dans quelques semaines. Dès que je pourrai confirmer l'ajustement, je commanderai un pneu + moteur pour remplacer le pneu avant. Si cela ne convient pas, cependant, j’ai une assez bonne idée sur la façon d’allonger l’axe d’origine juste assez pour qu’il soit adapté au pneu. Ce sera solide, mais probablement pas aussi propre - et je doute qu'il y ait de la place pour un frein à tambour, comme sur le DT Compact. En tout cas, je suis vraiment excité. Je posterai une mise à jour dès que j'aurai des nouvelles.

-
I just got word from Freda (at KWK) that the Ultra's front axis is not compatible with the Raptor. Apparently, it's due to the fact that your photo should not be a problem, other than looking a bit weird. I followed with the question of the swingarms. I'll get back with more info as soon as I have it
-
Just a little update from the past week of riding: Everything works great. No issues at all, thus far. Despite pushing the rear motor there's no excess heat to talk about (P7=1; P8=100; P9=3). I'm starting to look into what's needed for the front wheel modification, as I am very excited about this. I'm thinking about ordering a set of DT2 swingarms+"small iron axis of front suspension of Dualtron Ultra" from Kylin (as it's probably wider than the Raptor's). But I'm not sure if the latter fits into the Raptor's frame/space for front suspension unit. Well, I guess someone has to give it a try - and it's not that expensive, after all. Maybe the DT2's swingarms won't be needed, if the suspension axis fits, if it "widens" enough to fit the new wheel? Also - I'm about to install a new controller. It's called "Phaserunner" - it's FOC (Field oriented control; as opposed to trapezoidal, or square wave commutation like the Dualtrons', it's perfectly silent but still more efficient and also programmable), but that project will have to wait for now.
-
For sure more complicated in the front, and probably requires either some extension to the suspension axle, or different suspension arms (like those of the DT2 or Ultra). I did no extension at all for the rear - just plug and play, using the original bolts and washers. The suspension axle is the original, and the wheel axle already is longer on the Peipei (185mm, I think), but has the same thickness as the original.
-
Thank you! It's been great still, after quite a few more kilometres. Nothing seems off, so far. The motor does not get any hotter than the original one after riding (I measured sligthly above 60°C the other day after about 30 minutes ride, mostly in single motor mode, air temperature around 32°C). Actually, the new motor is even more quiet than the original. I'm curious, as I look inside this tyre, it looks a lot like the yuanxing. I haven't done any measurements, but maybe the magnets of this motor are slightly wider than the Raptor's. Since my French is not what it used to be, I'm not sure if I interpret your question correctly ("Par contre pour la roue avant ça a l'air plus compliqué, non ?") But if you refer to the rear being more complicated than the front - it may be, at least if you want to install disk brakes. Since I re-used the original drum brake of the Raptor and attached it to the Peipei motor, it was dead simple.
-
It's done. Peipei motor + tire (60v, 800w), Raptor original swingarms, Raptor drum brake just moved from original wheel to the new one. Screw holes and everything is identical, so it's simply a matter of swapping the flange for the Raptor's. I got the tire + motor yesterday, did everything tonight. Just came back from a 25 km test drive. Acceleration is perfect, no disturbances between the front and rear motors (front is still original, but not for long). Just left the hall wires of the new motor untouched.


-
That link did not work, it seems - try this one for the tire+hub motor: https://www.peipeiscooter.com/8-inch-200x90-wide-tire-double-shaft-brushless-dc-electric-scooter-hub-wheel-motor-with-disc-brake-phub-299.html
-
Salut! Lorsque vous avez essayé de faire monter les pneus du Compact sur votre Raptor, je me suis décidé à permuter mes roues contre ces roues aussi. J'ai trouvé celui-ci, équipé d'un moteur 60V 800W: https://s.click.aliexpress.com/e/4NwYzhW Pensez-vous qu'il pourrait simplement être connecté au Raptor? Ou est-ce risqué? Je ne suis pas très expérimenté dans ce domaine, alors je serais heureux de vos pensées. Avez-vous envisagé de faire la même chose au lieu de changer vos moteurs existants afin de les adapter au nouveau pneu?